Tuesday 31 May 2011

Craft Stamper - project peek


I mentioned in my previous post that I'd had a project accepted by Craft Stamper and the magazine arrived yesterday with my "Stamping for Scrapbookers" project. I wasn't expecting it so soon - time is really flying by this year (how can it be June tomorrow already?)

I'm so happy with this scrapbook page (it's very me, as it's a little bit painty and a little bit stitchy!) and here's a tiny peek at it.

Thursday 26 May 2011

Works in progress


I seem to have been a bit quiet on here over the past couple of weeks when I've been doing lots and lots of crafting. The photo above is a sneaky peek at an art quilt I'm working on for my little's boys room. I'm so pleased with the painting part of it and now I've just got to finish the sewing part. I've shown him the finished painting and he points at it and says "Choo choo" - can you guess what it is yet!?

I've spent the past few days working on a wedding scrapbook and we may be seeing the bride and groom this weekend and so pictures will follow next week. I like the recipients of a present to see it first before I upload it to the rest of the world.

I've also been working on a couple of projects for a couple of issues of The Scrapbook Magazine. I have just completed my first project for Craft Stamper too. They really liked it and have asked me to write some more projects for them in the future - yay!

Just to top things off, I've signed up to another online class called "She Had Three Hearts" about art journalling with Christy Tomlinson. I signed up as I feel my work is moving toward a more multi media approach and the class looked perfect. Christy has uploaded 28 videos in the first week! I have no idea when I'm going to find time to watch all those, let alone play with paints. The class looks amazing and I'm hoping to devote some time to it in a few weeks.

So I guess - watch this space for the results from all these projects!

Saturday 21 May 2011

Picture Inspiration


Here's an update on some photos from the Picture Inspiration class I'm taking part in at Big Picture. We are given weekly assignments and here's the results from the past three weeks.
The way this class works is great as I can mange one photo a week quite easily and it challenges me to take different photos. The photos I'm taking are proving to be a real inspiration for my other crafting whether it's scrapbooking or painting or just sparking off my new ideas entirely.

The photo above was for the assignment about taking a landscape photo with detail in the distance. Thanks to Picnik it has a lovely straight horizon, rather than one suitable for water skiing (as my Dad's jokes about sloping sea pictures)

The photo below was for the assignment about finding a mystery (in nature). I really love all the textures inside this poppy. You can see the black dots on the petals too as these are the "ladybird poppies" we grow in our garden.


This week's assignment was to shoot from the ground up. I got muddy too taking this picture of my daughter making mud pies!


Monday 16 May 2011

Scrapbook stitching


This weekend I had a little time to myself and I decided I wanted to do some scrapbooking. I have so many crafty ideas at the moment and a huge list pinned up next to my desk that my head is a bit confused and looking at an enormous pile of unscrapped photos didn't help much either. I've learnt that I like to follow a challenge at times like these. Just a little suggestion to get me pointed in the right direction. I really enjoyed the challenges Shimelle set for International Scrapbooking day and so I had a go at her sketch for this week too.

The large photo is printed onto linen from Crafty Computer Paper and I made the photo a little paler before printing too. I couldn't resist a bit of free-motion stitching again and you'll see on the close-ups that I did it twice as I tried it in white but it was too subtle and could barely be seen so I did it again in blue.


I saw a tutorial at the Maya Road Design Team blog about microbeads on chipboard, so I had a go at that too. I took photos of the layout to put on here and when I looked back at the pictures, the red bucket seemed to jump off the page. The colour ties up nicely with the bucket and spade in the photos but it looked too much. I added the blue starfish to the top (which echoed the colour of the shorts in the photos) and created the triangle of colours. I think it all works together much better now.


Sunday 15 May 2011

A page with a story

This is one page that definitely needs journalling to explain the weird and wonderful world of my daughter! The question was how to create a page about something only in her imagaination? She loves to make up creatures. She tells us their names and what they look like and uses them as a way of name calling, (but in a nice way) - "you snuffer", "a punkiskunkunk is small and looks like an ant and a tree".

I tried to capture at bit of her at this age by using her fingerprints to help tell the story...

I used the Monstorosity collection by Sassafras Lass on this page. Shimelle set a challenge to create a page with a story behind the photo. I really pleased with how I've told this story.

Saturday 14 May 2011

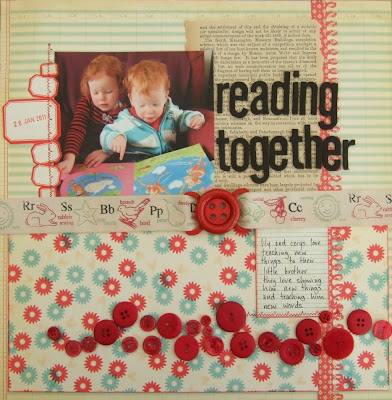
Reading together


I've been inspired to think about scrapbooking materials in a different way by Jenni Bowlin over at Big Picture Classes with her "Re-purpose, Re-think-Re-invent" class. It's got me looking in the vintage and collectable sections on Ebay to see what I could find. I found a great book which is an almanac from the 1890s which part of me found very hard to tear pages out of, but the crafter in me won and there's a page used on here.

We were sent a package of materials to use on challenges which included these little labels.


I also found a fantastic bag of buckles which included all sorts of metal and plastic buckles, including this button shaped buckle, which in turn inspired me to use red buttons on the layout to match.


Shimelle set a challenge to make a page using a patterned paper background, so in my continuing effort of doing two things at once, I think this has enough pattern on it!

Splashed by penguins


I've been meaning to do this age for months and the photos have been sitting in a bag with the penguin papers by Three Bugs in a Rug. I was inspired to get it finished by Shimelle's challenge to create a triangle of embellishments. My triangle is made up of the two penguins and the corner of sparkles. This page is based on a sketch from the March Pagemaps.

I had to get some stitching on the page too...


A photo challenge


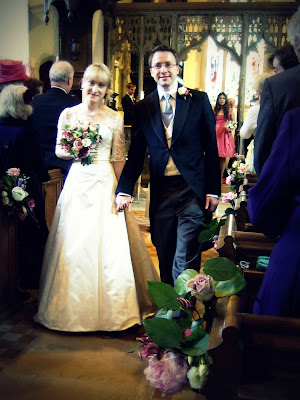
Last weekend we had a wonderful time at a beautiful wedding. The wedding was in a stunning medieval church but as the vicar pointed out it wasn't the best environment for photos. Shimelle ran an online event for International Scrapbooking day last weekend and one of her challenges was to edit a photo. I'm going to be working an a wedding mini book for the bride and groom and so it's a great opportunity to start on my photo adjustments.

Here's the new version, adjusted on Picnik. I particularly like their rotate tool which makes it so easy to correct all my wonky horizons (which my other half likes to point out!)


Friday 13 May 2011

Malteser cake - the yummiest cake in the whole world


My daughter has named this "the yummiest cake in the whole world" and so I thought I had to share it with you. After Easter we always end up with too much chocolate and I find it hard to fit it into our day to let the kids eat any. They always ask at inappropriate times - such as just before supper or just after breakfast, and so the chocolate sits in a collection for months. My usual way to use it up is my standard choc chip cookie recipe but we had lots of maltesers left from a birthday party this year and so after googling Malteser cake for a while I found this - YUM! The kids then ate a small piece of this with a bowl of strawberries for their pudding. This contains their Maltesers, mini smarties and two and a half buttons easter eggs!

I found the recipe HERE, but I adapted it a bit, so here's my version....

Ingredients
100g unsalted butter
2o0g milk chocolate
4 tbsp golden syrup
3 tbsp granulated sugar
4tbsp cocoa powder
225g Maltesers
225g Digestive biscuits
Mini Smarties

1. Put the butter, the milk chocolate, golden syrup, granulated sugar and cocoa powder together in a pan and melt together over a low heat.

2. Put the digestive biscuits into a plastic bag and crush them up.

3. Mix the digestive biscuits into the melted chocolate mix and then stir in the Maltesers (stir them in as quick as you can as the chocolate melts from the outside of them).

4. Press the mixture into a lined 8" square tin and press the mini smarties onto the top while it's still warm.

5. Leave to set in the fridge (this didn't take too long).

6. When it's set, use the paper to lift it out of the tin. The original recipe cut it into 12 squares but we cut it up much smaller (about 1.5" square or smaller)

7. The cake has lasted for three days in an airtight tin and the maltesers didn't go soft in that time. It's all gone now though!
Wednesday 11 May 2011

I'm never sewing in a straight line again!

I've been working on projects from Julie Fei-Fan Balzer's It's Sew Easy class again. I loved making these projects so much that my title is what I said to my other half as I was sewing away with a big smile on my face. Free-motion sewing is so much fun!

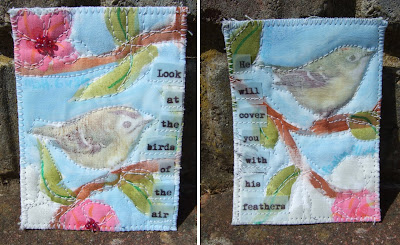
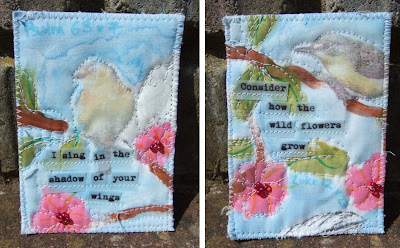
These are quilted ATCs which included birds from Digital Collage Sheets, which I transferred onto the fabric by printing them onto an inkjet transparency and using a gel medium. It's such a great technique. I stamped on my favourite feather stamp and them painted on the branches and blossoms before going crazy with the quilting!


I was so pleased with how the design how turned out that I didn't want to cover it up with text and so I printed my text onto vellum and then sewed each word on and finished the blossoms with some beads.
I've got a Dylon fabric pen which is almost the same colour as the sky blue and so I've written the bible verses where the text comes from onto each ATC, but it's quite subtle in the background.


Here's another play with free-motion sewing on a scrapbook page. - Love this!


Tuesday 10 May 2011

Guest at Scrap Revolution


This month I'm the guest designer at Scrap Revolution's blog. Here's a sneaky peek of the layout and card that's already on there...


And here's a peek at the project soon to be appearing...


Check out all the details here

Thursday 5 May 2011

Crafting around the edges

A popular theme for crafty blog posts is WOYWW (or "What's On Your Workdesk Wednesday") and so this post should probably be titled WOYLFT (or"What's On Your Lounge Floor Thursday"). This shows an update on how the big quilt I'm working on is coming along. I've sewn all the diamonds onto papers (nearly 800) and so now I can start stitching them together.

My lounge floor...


This is a great example of "crafting around the edges" which is how I get anything done. Most of my time is spent looking after my three kids and the general tidying, cooking and washing that accompanies that but I squeeze in crafting whenever I can. I have this basket of sewing so I can stitch a few diamonds together given a spare half an hour. I organise my photos into scrapbook kits with coordinated papers and embellishments and sometimes a sketch too, so that I can whip a page up if I find a spare hour. I also have sketch books for jotting down ideas as I find I have quite a bit of thinking time in the day but not a lot of sitting at my desk. Now the kids are getting a bit older they like to sit next to me and create alongside me. I've now introduced the girls to Fimo, so I can play along with them - they particularly like winding the handle on the pasta machine for me!

Do you have any top tips for squeezing in crafting into your day?

Wednesday 4 May 2011

A complete album

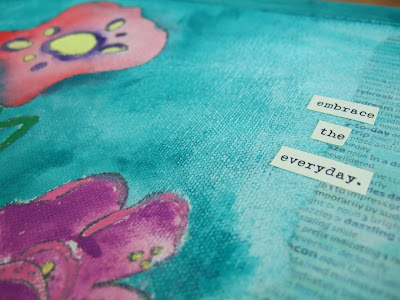
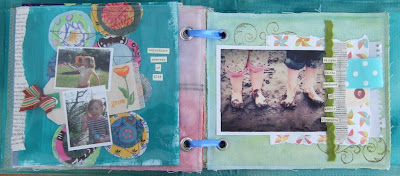
Today I can show you a whole album! I've finished my album from Donna Downey's London workshop "Gotta Love the Everyday" and so here it is. I've included the painty pages I showed you yesterday to show how the album looks together. The painty pages don't look quite a vibrant in these pictures as they are sitting in their page protectors, but it gives you the idea of how the colours of the next pages peek through the page protectors.


I learnt lots of new techniques in this album and my favourite was using the gel medium for the first time. I've been playing with it again today making image transfers, but more on that on another day.


Here's the finished album...


Hope you made it down this far! Thanks for looking at my colourful, painty creation!

Tuesday 3 May 2011

Two projects in one

I've been trying to catch up with the techniques in Julie's "It's Sew Easy" class but I've also been aware of all the other projects waiting to be finished. I was particularly keen to finish off my album I started at Donna Downey's workshops in London a few weeks ago. We had worked on the canvas pages on the day but there were several paper pages waiting to be decorated. I decided to put the two projects together and use Julie's fantastic techniques as backgrounds for my pages.

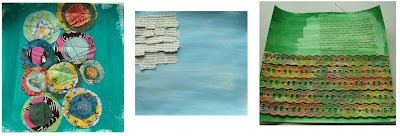
The pages at the top show the tag techniques from the sewing class, and below shows the completed pages in the album. (Click on the pictures to get a closer look)


Julie also showed us mono-printing techniques and I had a fun time getting really painty making these pages - you'll notice a bit of free-motion sewing creeping in too!


I'll show you the rest of the canvas album tomorrow...

Monday 2 May 2011

Tweet tweet


We've had lots of holiday days together and it's been a great chance to spend time as a family and also to catch up on a bit of crafting. I'm taking part in the online class "It's Sew Easy" with Julie Fei-fan Balzer and she has been showing us so many great techniques. Some of the early projects include things that I've done before but working together with new ideas and so I've have customized my own projects to try something new.

This little birdie includes techniques from two of Julie's projects, including customizing the fabric using stamps. The pattern for the bird comes from the book "Little Birds" by the Design Collective. It's a great little book that my mum bought me recently with loads of bird themed projects from lots of different artists.

I'll show you more of my Sew Easy projects tomoorow.

We've had another birthday here too, with a castle cake requested. Here it is complete with cone turrets, a biscuit portcullis and marshmallow battlements. The kids at the party had great fun picking the sweets off!