Tuesday 31 December 2013

2013 - A few of my favourite things

As it's nearly the end of 2013 I thought I would have a little look back at my favourite things of this year....

My favourite scrapbook page
This was inspired by a tutorial video from Creative Jumpstart 2013. I am very excited that Creative Jumpstart 2014 will be starting tomorrow. I love the comic book look of this page

A Breakfast fit for a superhero
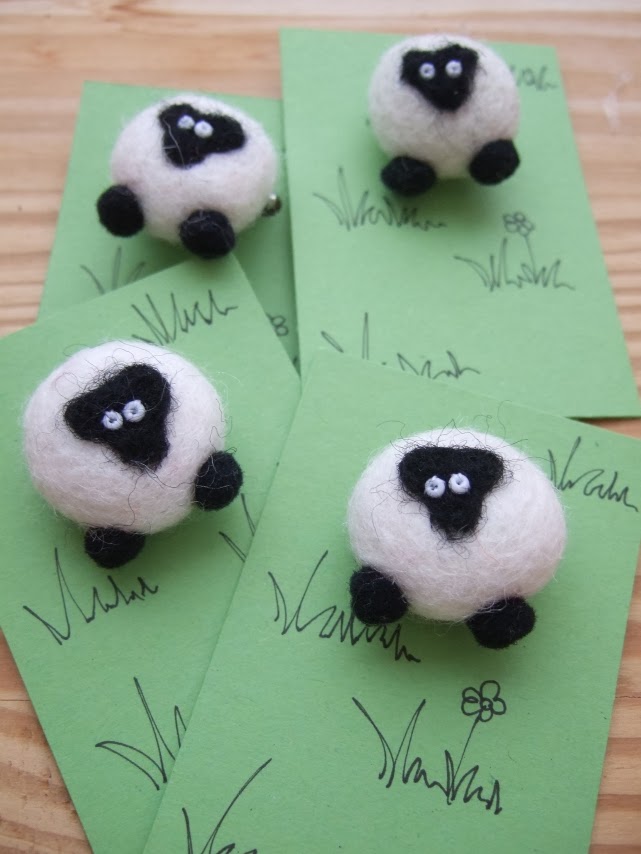
 My favourite new craft
I have had fun starting to discover felting this year (and I only managed to stab myself in the finger twice! ). Father Christmas even bought me a lovely new needle felting brush mat, so I won't have to felt into a sponge and peel it off afterwards anymore. I think Father Christmas may have had advice from my Mum.

A celebration postcard
My favourite photo
I took this photo while we were on holiday in Paris and I managed to get all three kids looking at the camera and smiling - hurray! How did we achieve this? My other half was standing behind me and licking my head to make them laugh!


Can you see a resemblance...


My favourite song
My favourite song this year is "Little talks" by "Of Monsters and Men". I love all the different instruments used in this and I think it is definitely a "jangly" song ( This word has been used to describe other music I like).


My favourite kids craft
This was the most fun. Paper plates + paint+ salad spinner = spin paintings!

Spin painting

My favourite book
A perfect blend of modern policing with a large dose of fantasy.
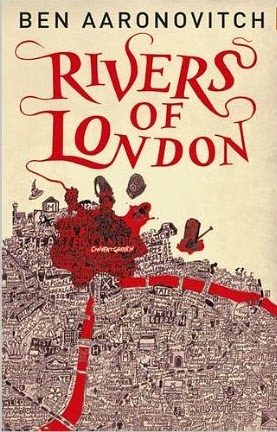
Rivers of London

 My favourite quilt
A pirate quilt for a pirate themed nursery, with my own pattern for the paper pieced boats.

A pirate quilt

 My favourite film
Star Trek:Into Darkness - A fantastic sci-fi film with the added bonus of Mr Benedict Cumberbatch!


And a New Year's Resolution to finish the year... I will try to finish all the online craft workshops I am halfway through!

Monday 30 December 2013

Christmas cookies in a jar


I love to give handmade gifts at Christmas but sometimes time runs short. This year I saw the idea of making cookies in a jar and thought it would work well - and it did. I made 6 homemade gifts in half an hour! I found this page, which includes recipes and printable tags. I did have to remake the instructions for the jars though as it talked about cup measurements instead of grams or ounces .

We tried a couple of the recipes out first, just to make sure they were nice and these cranberry cookies were our favourite ( we found the Santa cookies a little too sweet).


And for my friend who has a wheat and dairy free diet, I found this recipe here, for chocolate oat cookies, which works perfectly in a jar. She has a wheat free diet, not a gluten free diet, but I think you can get gluten free oats for a gluten free version.

Friday 20 December 2013

Felt pebble brooches


Continuing on a sheep theme, I wanted to make some sheep brooches to sell at our Christmas Tree festival (if you are curious why there are so many sheep on here check out this post!). I made the brooches using a white felt pebble as a base (like this). I have some tiny cookie cutters that I use for Fimo and this time I used them as a felting shape. I placed the cookie cutter onto the pebble and used the felting needle to to felt the coloured  shape. I used a heart for the heart brooches and I used a shape a little like a club from a pack of cards upside down as the sheep face.

I embellished the sheep brooches with pompom legs and bead eyes before stitching on a badge back. I finished the heart brooches with seed beads around the edge. I particularly like how the hearts turned out. 


These all sold well at the craft table for £3 each and I think the background cards make them look even better.


Wednesday 18 December 2013

A Christmas sheep bauble, or should that be Baaaaable!


Things gave been a little quiet on here as we have been besieged with winter illnesses, but when I wasn't nursing a poorly child, I did manage to get a little crafting done. We had a Christmas tree festival last weekend at church and it included a craft stall selling things for our chosen charity (UWCM). I decided to try to make some Christmas baubles to sell and came up with these sheep. I love them and I'm a bit sad they all sold - but I can always make some more!

They are a no-knit woolly decoration. I started with a polystyrene ball and wound some white wool around it. I think I actually used a cotton yarn, but it was just whatever I had left in my wool box. I wrapped the yarn around the ball until it was completely covered and then tied it off and used the same yarn to make a hanging loop. I made the hanging loop now so that I could hold it up and work out where to stick the face.


The head is made from a ball of black wool just wrapped around itself until it got to the size I liked. I sewed on two tiny white beads for eyes. I could have used small wobbly eyes, but I didn't have any. I cut out a strip of black felt with rounded ends to make the ears and glued the ears to the body with the head stuck on top. I pushed a pin through the head while the glue was drying.

I used 31/4 needles and knitted a scarf which was 3 stitches wide so didn't take long to knit and stitch around the sheep's neck. The sheep was finished by gluing 4 tiny black pompoms onto the base of the sheep for legs.

I love how these turned out and I would love to make more. And speaking of the Christmas tree festival, there was a vote to choose the favourite tree and our Brownies tree won - Hurray!


Around the base of our tree were pinecone hedgehogs in willow baskets that the Brownies made themselves, as well as pompom caterpillars, bead dragonflies and foam owls. I'm so pleased that everyone liked it so much as we had a lot of fun making it.


Monday 9 December 2013

Happy Days


I made this page using my Cocoa Daisy kit from September. This kit had the perfect colours to go with photos for redheaded children! 

I used a Crafter's Workshop stencil and Distress Inks to make the background.


I had to add a little stitching...


The fun thing about using a kit is that you end up with items you may not usually have bought, like these cuties cut from a sheet of paper. I think they look at home on this page.


Saturday 7 December 2013

A Christmas church Banner


I have started a new craft group at church and together we are working on banners to be hung in the church. This is our first banner from our new group and it has worked so well. We had lots of lovely comments from members of the church on Sunday.

We used lots of 2" squares of fabric with Bondaweb on the back of each one to create the background, which were all ironed in place. We used a LOT of Bondaweb!


The star is made from gold fabric which was also used to bind the edges of the banner and looks very festive. As we are beginners to making banners there are lessons learned from every one we make. This time I could have used much thicker gold cord as the star's rays.


And , of course, we had to have sheep on the banner this year. Why sheep? Our church have a knitted sheep trail around our town to encourage people to come to a Christmas church service. Some of the kids in our church have made a fantastic video to promote the sheep trail. I'm not technically minded and can't get the video to appear on here , but you can see it on Youtube HERE.

Thursday 5 December 2013

Craft Stamper news


I have exciting news. I am a new contributor for Craft Stamper. You can see my first project (technically not my first as I had a scrapbook project in there a few years ago) in the new January issue as I am making some items using that fabulous free feather stamp you can see on the front cover.

Wednesday 4 December 2013

Wednesday Love: Nativity plays


We've loved watching the kids in the school nativity plays over the years. This year we have two in the nativity, one "Child" and one "King". We had fun making a sparkly crown with card, tin foil and some sticky jewels - along with a tunic made from curtain lining and decorated with ribbons.

My favourite costume seen in the school nativity was in last year's play and it wasn't one of our kids - it was the dancing Etch-A-Sketch! The girl's family made a fantastic job of her costume and it looked exactly like a giant version of the toy. We have to hope that there won't be so much illness going around the school this year. Last year Mary was missing in the stable as she was poorly.

We are definitely getting into the Christmas Spirit in our house now.

Tuesday 3 December 2013

The Great Big Stitched Postcard Swap update


 A little while ago I made a felted image for a postcard as part of the Great Big Stitched Postcard Swap. I was very excited to receive the postcard above from my swapee (is that a real word?) Eleanor Reilly

She has put in so many lovely details (according to her blog, the red headed lady is inspired by me).


The theme is "Celebration"and Eleanor has cleverly included a whole miniature book of quotes about celebrating.


I love the texture elements she included.


Thank you Eleanor. It looks lovely pinned up on my inspiration board in my craft space xx

(P.S. I just wanted to add that Eleanor posted this on time for the swap and it's just me who's late adding it to my blog)
 

Thursday 28 November 2013

A charm pack tote bag


This week it was a friend's 40th birthday and so I thought I would make a bag - we can always use a pretty bag! I found this tutorial via Pinterest and so I modified it a bit to make it a little simpler (although I do love the ruffled strip on the original).


Wednesday 13 November 2013

Castles and Layers


More cardboard box castles here, but this time they are on a layout.I created this page for a layers challenge on last week's Cocoa Daisy online crop. It has layers of moulding paste, watercolours, papers, stickers, chipboard and stitching.

I used a Crafter's Workshop Brick stencil with moulding paste to make this background.


I continued the layering theme by layering up Maya Road letter rub-ons for my title.


Monday 11 November 2013

A journalling challenge


Lisa Saunders set a journalling challenge over on Cocoa Daisy and so here is my page with a thankful theme and lots of journalling. I collected the bits and pieces for this page a little while ago and added the moulding paste but this challenge helped me to bring it all together and with a lot more journalling than I would have included before.


I love this chip board piece from American Crafts and I think it works so well with some papers from Cosmo Cricket's Summer Love collection behind it.


I included journalling around the edge of the page, by the photos, on a ticket and on the wooden hexagons too.


I have really enjoyed following these challenges as it is a great starting point for layouts. The challenges are well worth a look with lots of fantastic inspiration from a very talented design team.

Saturday 9 November 2013

Cardboard box castles - Part 2


My previous post on cardboard box castles has proved very popular and now it's time for another one as the ginger one is learning about castles and had to go into school for a day dressed as a princess. Here's our latest castle. We got a bit carried away and it got bigger and bigger. Luckily we could still fit it through the door! We used the book "See Inside Castles" as our inspiration - even including a flap so we could "see inside".

This was how we started out, with boxes and Pringle tubes. My hot glue gun came in very handy to make sure it was all secure. We gave it a layer of papier mache with watered down PVA glue and tissue paper to add extra strength. It would be awful if it fell apart on the way to school! I didn't glue the castle onto the courtyard, which made it all easier to paint and to transport.


Then we painted it, inside and out with grey acrylic paint (and green for the courtyard). I cut out window frames which were painted separately and glued on when it was all dry.


Here it is completed. The ginger one used a black pen to draw on lots of arrow slits and we used a selection of Lego knights (from the castle set I had when I was little), which we glued on with Copydex so it could be easily peeled off later.


She wanted a dragon on the roof and so she used a packet of green Fimo Air light (with a little bit of white) to make her own dragon.


There was a garden in the castle picture in the book and here's our version with scrunched up green tissue.


In a recent school trip to a local castle they learnt how the knights would pour boiling wee onto their enemies. Here is our bucket of wee!


Luckily our pirate ship has lots of small plastic barrels we could use in the cellar


We used Lego to make chairs, tables , benches and a fireplace for the banqueting hall.


What castle would be complete without a princess and her 4 poster bed?