Tuesday, 28 June 2011

Deep Peace

I've been working on a piece of art for a friend's house and it's been a great excuse to play with some of the techniques I've been learning recently. The words are an ancient Celtic blessing.

I started with gesso on some 12 x 12 card. I wanted to add texture and I knew the colour of the background would be quite flat, so I made my gesso swirly...


I stamped some stars and fishes using StazOn ink and then added colour with my NeocolourII watersoluble crayons. I found that with a little extra water I could lift off the colour over the stamped images.


I built up the layers using stencils. Here's my bird stencil again. This time I used Distress Inks and I was worried that it was going to wipe off from the gesso background so I went around it with a pen.


My favourite part of the piece are my shining stars, some machine stitching swirls with some hand stitching sparkle on the top.


Friday, 24 June 2011

Playing with pages


I've finally finished the two pages I started at the last crop using the art journalling techniques I've been learning recently. This first page started out with gesso as a background and used some old diecut flowery card as a stencil with pink distress inks.

The chandelier is an image transfer from a picture from an old magazine using gel medium. I haven't tried this technique before and it worked so well. I'm looking forward to doing this again.


Here's my favourite new stamp again from Stampendous. This time I coloured it with watercolours.


I started my second page by collaging lots of paper ephemera onto the background. I painted over to mute the effect. I used foam and clear stamps with paint and a Prima paintable stamp with black ink.


Thursday, 23 June 2011

Looking through a lens


I've been continuing with my attempts to improve my photography and I've been following the Picture Inspiration challenges each week. This week's theme was "Exploration" and so I added a picture I took in our garden a little while ago which I found exploring in the undergrowth.( Have you ever wondered why when plants get overgrown they become undergrowth - how does that work? ) This flower made such a perfect heart.

Last week's them was "Moody". This graffiti has been sprayed onto the shutters of our local fashion store. I've been meaning to photograph it for ages but it can only be seen when the shop is closed so it's been tricky to catch. The shop was being opened just as I arrived and the lady kindly left this shutter until last for me.


One of the areas I wanted more teaching on was portrait photography and so I've signed up for Cheryl Johnson's "Beautiful People" class. I used to go to Cheryl's scrapbooking classes many moons ago when I went to scrapbook weekends and I remembered how much I enjoyed her teaching style. I've heard lots of good thing about her photography classes and so I signed up for this - despite promising myself I wouldn't sign up for more classes for a while - oh well.

We had to start the class taking a self portrait. Here I am...


Wednesday, 22 June 2011

Plans

Today's sketchbook page was an idea floating around in my head for a while. I used pages from an ancient A-Z to make the background which I coloured using distress inks. The ink didn't take where the gel medium had transferred onto the top of the papers when I was gluing it down, but I really like the effect.

I continued with the distress inks to stencil and stamp the rest of the details with StazOn ink for the title as I wanted it to be bold.

The bird stencil comes from a book, "Stencil 101". It has some fantastic , bold, modern stencils in a great size.

Tuesday, 21 June 2011

New watercolours


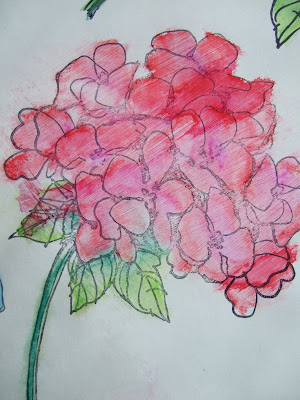
I've had a couple of new art materials arrive over the past week - Neocolour II watersoluble crayons and Staedtler Aquarelle watercolour pencils. I've been watching various tutorials online which use gesso as a base and so I wanted to have a play with the materials to see what suited my style best.

I painted gesso onto half of a page in my A3 sketchbook and stamped my favourite new Stampendous stamp with StazOn around the page.

Neocolour crayons on gesso - the colours were vibrant and smooth but showed the texture of the gesso underneath. The colours stayed wet for quite a while which was great for moving them around but I also kept smudging them too.


Neocolour crayons straight onto paper - I love the bright colours here. The initial drawing can be seen through the colours but I like this as it adds shading. It dried quickly so not much smudging.

Aquarelle watercolour pencils on paper - colouring in firmly with the pencils gave a good vibrant colour. Pencil marks weren't very visible after painting. A subtler effect could be acheived than with the Neocolour crayons. You can see the smoothness of the colours in the corners scribbling I did.


Aquarelle watercolour pencils on gesso - The colours here were more muted and stayed wet for longer.

An experiment! I coloured in the flower with the Neocolour crayons and then used a mini mister to wet it. I added too much water and it all ran a bit. I was just wondering if this would work for when we are camping and I want to take some sketchy materials with me.


Sunday, 19 June 2011

Dance in the rain


This is a quote I saw as a print in a catalogue recently and I really like it. I watched a couple more videos from the "3 hearts" workshop and had a play...

The background was made with acrylic paint, then a mist then alcohol inks. You can see how wet it was.


I used Claudine Hellmuth's layered stamps to add the images to the page.

I used a foam stamp set to add the words but they weren't standing out enough and were getting a bit lost in the background. I went around each letter with a black pen but that didn't do much, so I went around them again with my new white Sharpie pen. I attempted to colour gel medium with acrylic paint and use a raindrop stencil I'd made to make some dimensional raindrops. It looked awful! I wiped them off and doodled over the marks.


Look at the birds

Yesterday I got a Facebook invite from my friend Robyn to join in with the "30 day sketchbook challenge" . The idea is that it takes 30 days to create a new habit. I bought a new sketchbook last week as I have lots of ideas for images in my head that I wanted to get down on paper. I had been putting off starting the new book so this seemed like the perfect platform to make myself go for it.

Our church have just moved out of our building for the next year as we are undergoing a major refurbishment of the building. We are all really excited about new things. I feel like my work is moving towards church banners, in a modern, exciting multi media, stitchy, painty sort of way. I bought my new sketchbook to get some ideas down on paper. The book is A3, which is the size I felt happiest working in when I was an art student. This is new first new A3 book for years and I'm loving it!

I have learnt so many new techniques in Christy Tomlinson's "Three Hearts" workshop and I'm kind of amazed at what I achieved in my book in quite a short space of time. I couldn't have produced this page a month ago.

I started the background with some acrylic paint brayered on.


I put much too much paint on and so I lifted some off with kitchen towel. Look at this fab texture it created...


I had words in my head from Christy and from Donna Downey about adding depth and texture as I put the page together, so I added some white bubble wrap print to the background too. The tree is some corrugated card, painted. The birds are a gel medium image transfer using pictures from an old kids picture book.

I added some white Prima flowers with some paint centres too.


Wednesday, 15 June 2011

Choo-choo

Today I have my very own "TA-DA" moment. Here is my art quilt I've been working on and I LOVE it! I have really enjoyed taking part in Julie Fei-Fan Balzer's class "It's Sew Easy" and I used the techniques from one of her projects to create this art quilt. I painted the train onto some calico with acrylics and then went crazy with free-motion stitching over the top.

I've been planning to make a pieced train quilt for my little boy's room for a while, in fact I drew out a pattern last summer. At the rate I was going though he was going to be 18 before it actually made it up on his wall! I love this technique of combining sewing and painting as it means I have achieved a finished piece in only a couple of weeks instead of a couple of years.

Can you see the words in the steam?


I switched thread to create the swirly white clouds.


Tuesday, 14 June 2011

Looking up, looking down


Over at Picture Inspiration we've been looking up and looking up and looking down as subjects for our photos. A couple of weeks ago Tracey suggested we chose a subject, took photos looking up and down and put them together to make a diptych. I wasn't particularly excited about that initial challenge but then I looked at the class gallery. There are some fantastic pairs of photos on there and it really made me think. This is such a great technique for when I'm trying to capture a subject but can't decide which angle is best. Maybe the answer is take two different angles and stick them together.

My photo is of some elderflowers in our garden and I really like the looking up picture with the sun flare.

Sunday, 12 June 2011

As for me and my house


In March I signed up for Emily Falconbridge's class "Got Paint" over on Big Picture classes. I love using paint. I think it soothes my soul and I know I'm at my happiest when covered in a little bits of paint. This class was about using paint in various ways in scrapbooking. I didn't complete all the homeworks as some of the techniques were things I'd done before, but it was great to get Emily's perspective and she showed us some wonderful pages. Our final project was a wood-backed larger piece of artwork and here's my results.

Half term was the perfect time get my eldest daughter to help me make the background of the picture.


The base is an old shelf and the beautiful background was pieced together from my scrap paper box. It's such a fabulous technique as the effect is so similar to patchwork but it's so fast to do.

The title is from one of my favourite songs we sing at church and the painting will be put up in pride of place in my kitchen.


Thursday, 9 June 2011

A wedding album

A few weeks ago we were privileged to be a part of a wonderful wedding day. I made a wedding scrapbook for the bride and groom, which I am pleased to report they loved! I used a Kraft album from Paperchase and I found the pages much thinner than when I used a similar book from them before. I glued two pages together for each page and used lots of Herma - the whole book used 5 rolls (I'm glad I found some on sale recently).

I used quite limited materials so that there was continuity through the book. I had five or six pieces of patterned paper, some white Basic Grey rub-ons, Maya Road Kraft Doilies and a couple of sheets of 7gypsies wedding themed stickers.

When I make a wedding scrapbook I try to journal all the things from the day I wish had been documented at my own wedding. I write out all the songs and readings, photograph the flowers and the venues, I include some confetti thrown on the day, and I write out a guest list. Through the wonders of Facebook and Photobox I was able to access some photos from friends and family, so these photos aren't all mine (but most are).


(I claim responsibility for these two pretty girls!)


Tuesday, 7 June 2011

Inspiration - Beautiful Things


I read this quote a couple of nights ago on the Owl City blog. Owl City is actually a guy called Adam Young and whether his music is to your taste or not, I'd recommend checking out his blog to read the most beautiful, poetic writings there.

One of things I think I've struggled with in the past about the objects that I make is that I'm a very practical person and I've always thought about how I can make something useful. My artwork will be turned into a gift for someone or a cushion cover or something else to use in the house. I've also been inspired by the quote by William Morris, "Have nothing in your house that you do not know to be useful, or believe to be beautiful".

I think I have to give myself permission to accept that what I am making is beautiful and that is enough purpose to strive for.

Sunday, 5 June 2011

Creative scrapbooking


I have found a new way to scrapbook and I LOVE it! OK, so it's probably not new to hardly anyone else but it's a new way for me. I signed up for Christy Tomlinson's art journalling workshop "She had three hearts" and it is so inspiring. Art journalling isn't something I'm doing at the moment, but I wanted to use all the techniques on my scrapbook pages. I've been a bit quiet on my blog over the past week as there are so many videos to watch and so many ideas to take on board from the class. Yesterday was the day of my local crop when I get to go and play for the whole day. I haven't had as much fun scrapbooking for ages. I sat with paints, inks, mists, stencils, stamps, gel medium, torn up cardboard, rub-ons and even a bit of glitter and got messy!

These pages are inspired by Christy's workshop, with a bit of Julie and a bit of Donna inspiration too.

Here's a closer look at my first page including my homemade heart stamp made from corrugated card...


Don't you just love this texture...


A painty page with that heart stamp again... And I love Christy's idea of dating the page using a page from a diary.


Another page which started with gesso on some black cardstock, then layered up with paint and ink and Claudine Hellmuth's stamps - love them!


This page also features the smallest title in the world.


I worked on two more pages as well which are nearly finished, including a gel medium image transfer which worked brilliantly.

I've been watching all these various videos from inspiring artists and I've noticed how often they use the phrase "That makes me happy". I've been working out what makes me happy and this way of scrapbooking if definitely one thing that makes me very happy.